Introduction
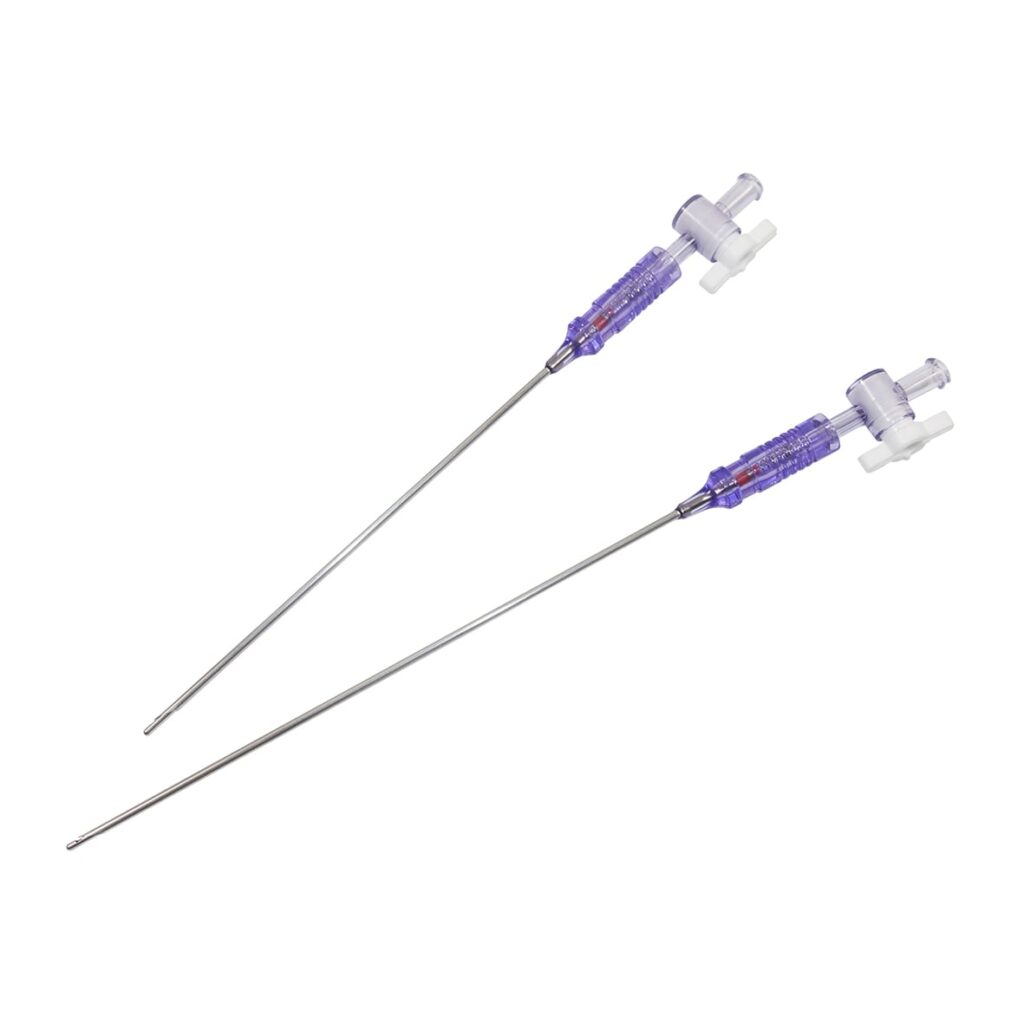
Veress Needle : A Safe and Effective Tool for Laparoscopic SurgeryLaparoscopic surgery has revolutionized modern medicine by allowing complex procedures to be performed through tiny incisions, reducing pain, scarring, and recovery time for patients. A key component of these minimally invasive surgeries is the creation of a pneumoperitoneum—a temporary inflation of the abdominal cavity with carbon dioxide (CO₂) gas to provide surgeons with a clear working space.
One of the most trusted tools for establishing pneumoperitoneum is the Veress needle, a spring-loaded device designed to minimize injury while accessing the abdominal cavity. First developed in the 1930s by Hungarian physician Dr. János Veress, this needle was originally used for draining pleural effusions but later became indispensable in laparoscopic surgery.
In this article, we’ll explore:
✔ How the Veress needle works
✔ Its key uses in modern surgery
✔ Advantages over alternative techniques
✔ Potential risks and how they’re mitigated
✔ Best practices for safe insertion
Anatomy and Mechanism of the Veress Needle
The Veress needle is a two-part system designed for safety and precision:
- Outer Sharp Cannula – A bevelled needle that pierces the abdominal wall.
- Spring-Loaded Blunt Obturator – A retractable inner stylet that automatically advances once the needle enters the peritoneal cavity, protecting internal organs from puncture.
How It Works
- Insertion – The needle is introduced through a small incision (typically near the umbilicus).
- Penetration – As it passes through the abdominal layers, resistance keeps the sharp outer needle extended.
- Safety Mechanism Activation – Once the peritoneal cavity is entered, resistance drops, causing the blunt inner tip to spring forward, shielding organs from injury.
- Insufflation – CO₂ gas is pumped in to inflate the abdomen, creating space for laparoscopic instruments.
Primary Uses in Surgery
The Veress needle is most commonly used to establish pneumoperitoneum in procedures such as:
1. General Surgery
- Cholecystectomy (gallbladder removal)
- Appendectomy (appendix removal)
- Hernia repair (inguinal, umbilical, or ventral)
2. Gynecological Procedures
- Diagnostic laparoscopy (evaluating pelvic pain or infertility)
- Ovarian cystectomy (removing ovarian cysts)
- Hysterectomy (uterus removal)
- Tubal ligation (female sterilization)
3. Bariatric Surgery
- Gastric sleeve and gastric bypass procedures
4. Emergency & Diagnostic Laparoscopy
- Investigating unexplained abdominal bleeding or trauma
Advantages of the Veress Needle
✅ Minimally Invasive – Requires only a tiny incision.
✅ Reduced Risk of Organ Injury – The blunt-tip mechanism prevents accidental punctures.
✅ Quick and Efficient – Rapid establishment of pneumoperitoneum.
✅ Cost-Effective – Available in both reusable and disposable forms.
Potential Risks and How to Avoid Them
While the Veress needle is generally safe, improper technique can lead to complications such as:
| Complication | Cause | Prevention |
|---|---|---|
| Bowel or vessel injury | Incorrect insertion angle/force | Use proper landmarks, aspirate before insufflation |
| Subcutaneous emphysema | Gas leaking into tissues | Confirm intraperitoneal placement |
| Gas embolism (rare) | CO₂ entering a blood vessel | Monitor insufflation pressure |
| Failed pneumoperitoneum | Needle misplacement | Verify with aspiration & hanging drop test |
Safety Checks Before Insufflation
- Aspiration Test – Withdraw the plunger to check for blood or bowel contents.
- Hanging Drop Test – A drop of saline placed at the needle hub should be drawn in by negative abdominal pressure.
- Low-Pressure Insufflation – Start with a low flow rate (1 L/min) to confirm proper placement.
Alternatives to the Veress Needle
While the Veress needle is widely used, some surgeons prefer:
🔹 Hasson Technique (Open Laparoscopy) – A small incision is made, and a blunt trocar is inserted under direct vision (lower risk of injury but slightly slower).
🔹 Optical Trocars – Transparent trocars with embedded cameras for visual entry.
🔹 Direct Trocar Insertion – A trocar is placed without prior pneumoperitoneum (higher risk, requires expertise).
Each method has pros and cons, but the Veress needle remains popular due to its speed, reliability, and safety features.
Best Practices for Veress Needle Insertion
To maximize safety, surgeons follow these steps:
- Patient Positioning – Supine or Trendelenburg (head-down tilt for pelvic surgeries).
- Incision Site Selection – Typically at the umbilicus (thinnest part of the abdominal wall).
- Controlled Insertion – Hold the needle like a dart, using a 90° angle for normal-weight patients or 45° for obese patients.
- Double-Click Sound – A sign that the needle has passed through the fascia and peritoneum.
- Confirm Placement – Perform aspiration and hanging drop tests before insufflation.
Conclusion
The Veress needle is a time-tested, reliable tool that plays a crucial role in laparoscopic surgery. Its spring-loaded safety mechanism reduces complications, while its efficiency makes it a favorite among surgeons.
While newer techniques like optical trocars and AirSeal systems offer alternatives, the Veress needle remains a gold standard for establishing pneumoperitoneum safely and effectively.
For surgeons, mastering its use is essential—proper technique minimizes risks and ensures optimal patient outcomes.
Would you like a section on historical evolution or comparison with robotic-assisted techniques? Let me know how I can enhance this further!
References
- SAGES (Society of American Gastrointestinal and Endoscopic Surgeons) Guidelines
- Journal of Minimally Invasive Gynecology
- Clinical studies on Veress needle safety profiles
Disclaimer: This blog is for informational purposes only and not medical advice. Consult a healthcare professional for treatment.


